I have been a nurse for eleven years, and for the last three I have charted from home most evenings. Two monitors on cheap fixed stands, neck bent forward, shoulders creeping up toward my ears by 9 PM. I bought a monitor arm thinking that alone would fix the problem. It helped, but it did not fix anything until I learned how to actually position the thing. If you have already bought an arm or are shopping for one right now, this guide is the exact sequence I wish I had found before I spent two months with it set up wrong.
The VIVO single monitor arm is the one I use on my main screen. It handles monitors up to 32 inches and 22 pounds, covers virtually every home office monitor out there, and clamps onto a desk in minutes. What it cannot do is position itself. That part is on you, and the five steps below will walk you through it exactly. Get these right and the neck tension that follows you home from a shift should ease considerably within a week or two.
Still Running a Fixed Stand? Here Is the Monitor Arm That Changed My Setup.
The VIVO monitor arm (B00B21TLQU) supports monitors up to 32 inches and 22 lbs. It has over 20,000 reviews, is budget-friendly, and installs in about 20 minutes. Before you follow these steps, this is the arm I used.
Amazon Check Today's Price on Amazon →Step 1: Mount the Clamp at the Right Desk Position
Most people clamp the arm at the far back edge of the desk, which forces them to reach or lean forward to see the screen clearly. Instead, clamp the VIVO arm roughly four to six inches from the back edge of the desk surface. This positions the arm's pivot point so that when the arm extends forward, the monitor face lands naturally about 20 to 28 inches from your eyes when you are seated upright.
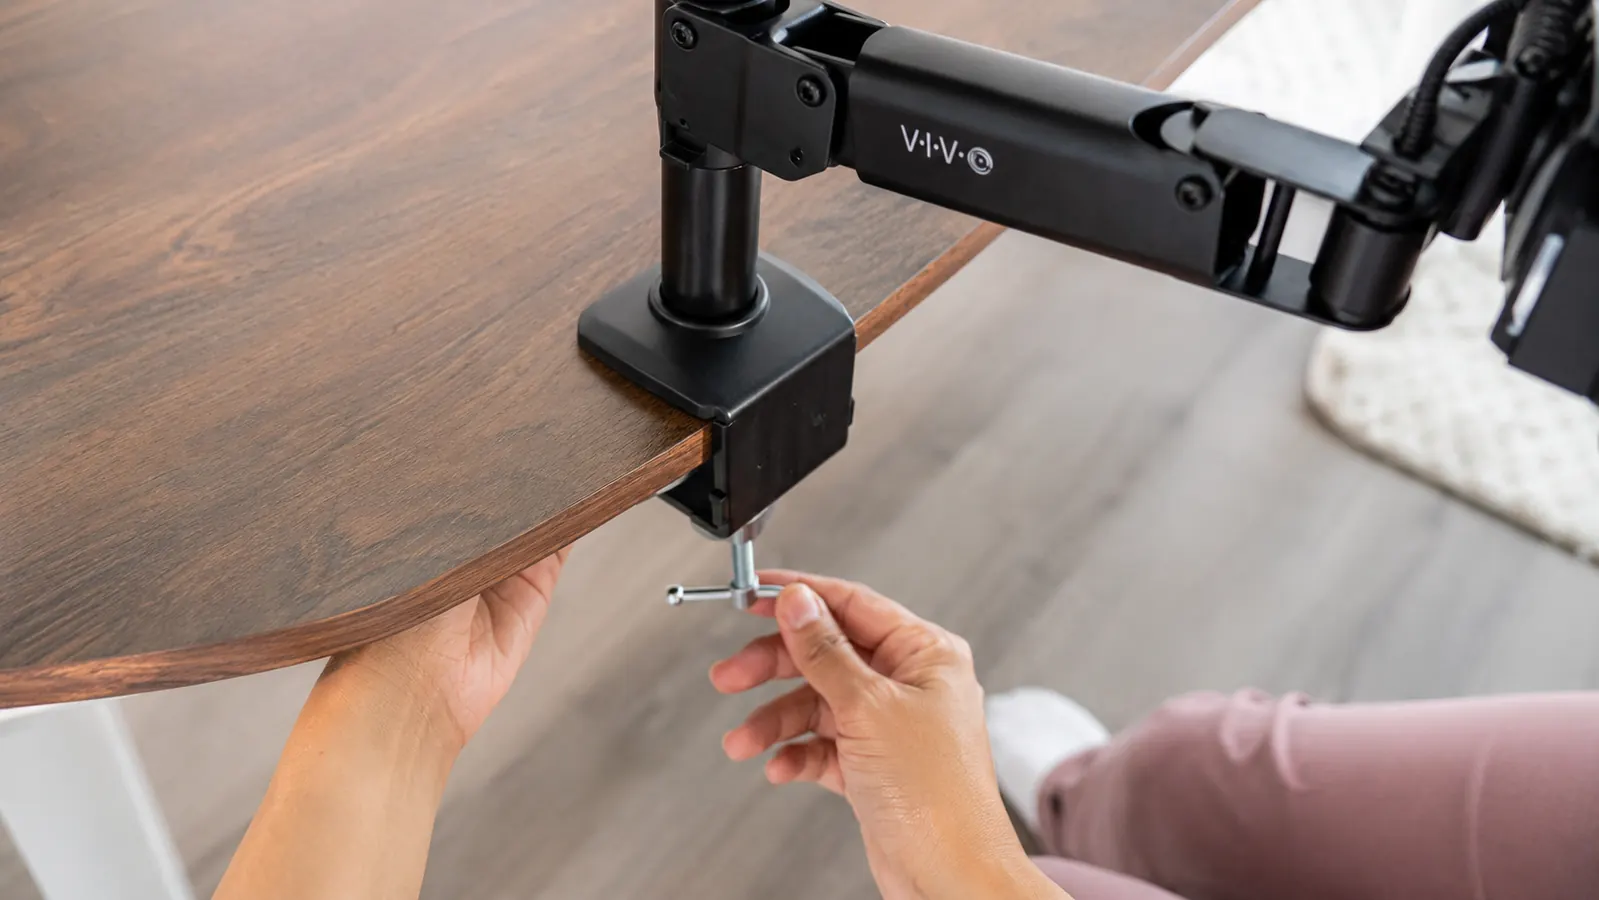
To mount the clamp: slide the c-clamp over the desk edge, tighten the bottom bolt by hand until snug, then give it a quarter turn more with the included wrench. You want firm resistance with no wobble, but you do not need to over-torque it. Desks up to about 3.5 inches thick fit the standard VIVO clamp without any grommet adapter. If your desk is thinner than half an inch (glass or thin plywood), use the included rubber pads and go easy on the tightening.
If your desk has a lip or cable tray that prevents rear-edge clamping, VIVO sells a grommet mount adapter separately. Thread it through a pre-existing hole (usually 20 to 80mm diameter) and use the included washer and nut underneath. The grommet mount is actually more stable than the c-clamp on thin desktops.
Step 2: Set the Pole Height Before You Attach the Monitor
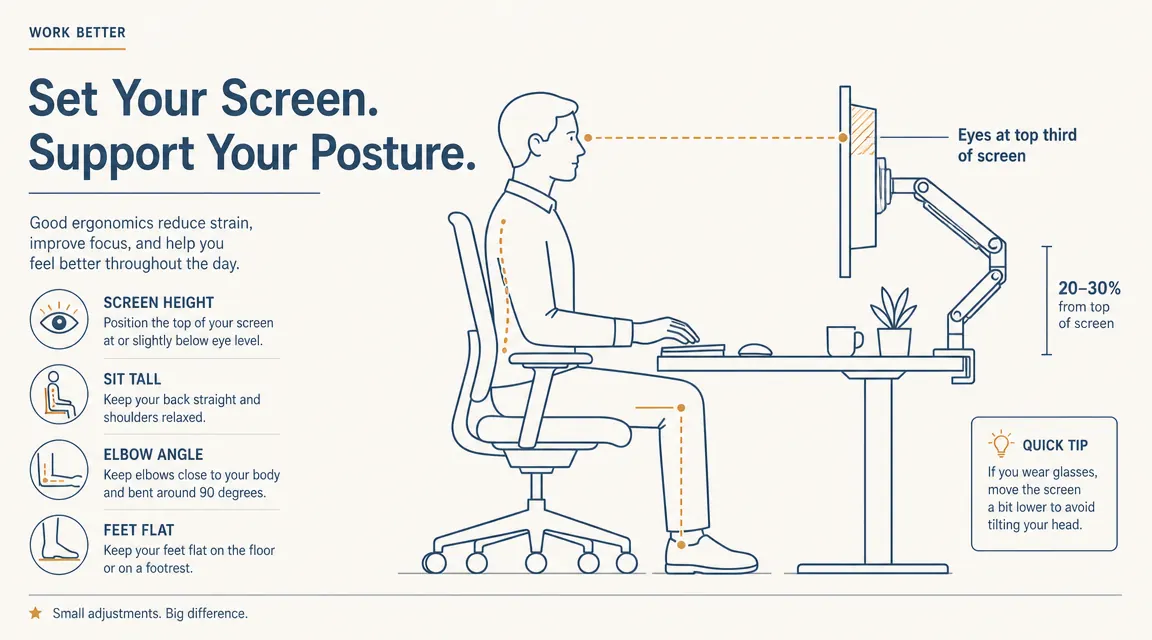
This is the step almost everyone skips. The VIVO arm has a vertical pole that slides up and down before you lock it. Set this height while the arm is empty, before the monitor is on it. Sit at your desk in your normal posture, eyes forward, and hold a ruler or just eyeball it: you want the horizontal arm joint to sit at roughly your eye level or one or two inches above. The arm will tilt the monitor down slightly from there, landing the screen face at the correct angle.
Once you have the pole at the right height, tighten the collar bolt on the side of the pole sleeve. This is the bolt that locks vertical position. A lot of people miss this one and wonder why the arm slowly drifts down over weeks. Tighten it until the arm does not slide with moderate downward pressure from your palm.
If you skip this step entirely, what you will notice after a week or two is a dull, persistent ache across the top of your shoulders and the base of your skull, especially on long session days. That is your body compensating for a screen that is sitting slightly too low. The temptation is to shrug it off as tiredness from the shift itself. It usually is not. It is a fixable geometry problem.
Step 3: Mount the Monitor and Set the Correct Eye-Level Height
Attach the VIVO VESA plate to the back of your monitor. Most monitors use a 75mm or 100mm VESA pattern, and VIVO includes adapters for both. Four small bolts, finger-tight, and then snugged up with the included wrench. The plate clicks onto the arm's ball socket with a locking pin.
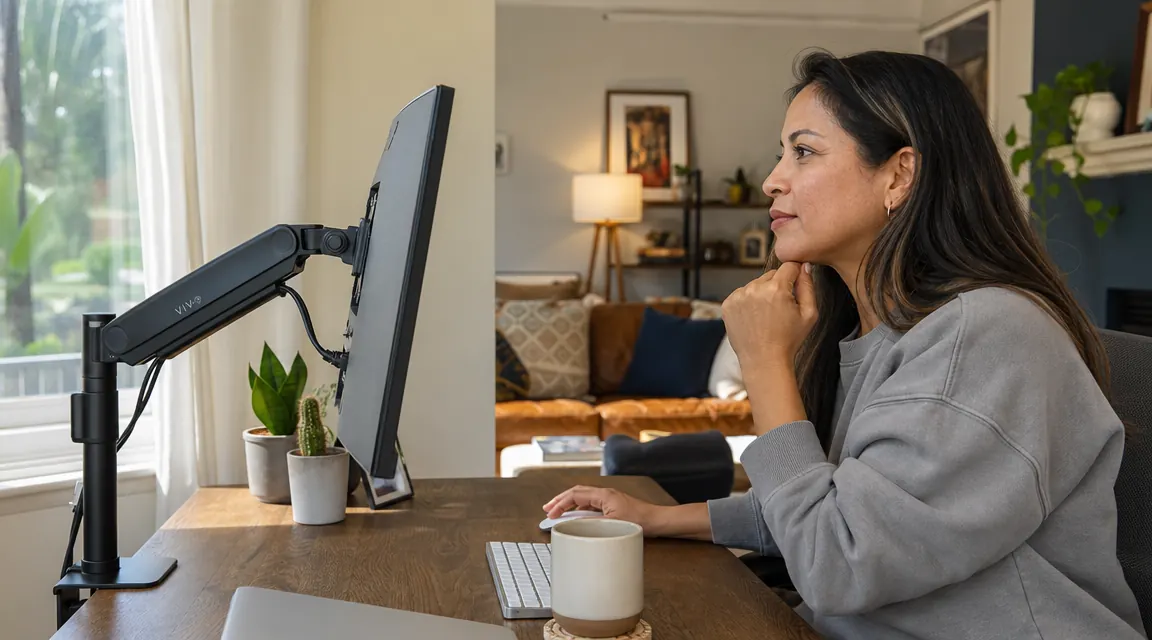
Now sit in your chair with your back resting naturally against the backrest, eyes forward and level. Adjust the arm's vertical position until the top edge of the monitor screen (not the bezel, the actual screen) sits at or just below your eye level. The ergonomic target is eyes landing at the top 20 to 30 percent of the screen when you look straight ahead. If your eyes hit the center of the screen when gazing forward, the monitor is too low and your neck will flex forward all evening.
For context on my setup: I am 5 feet 4 inches and I sit in a chair with the seat at 18 inches. My monitor top edge is at 57 inches from the floor. That is the reference point I landed on after two weeks of small adjustments. If you are taller, raise it; shorter, lower it. The target is always: top edge at or just below seated eye level.
Step 4: Dial In the Tilt and Distance
Height is the biggest lever, but tilt and distance matter too. The VIVO arm lets you tilt the monitor face up to 15 degrees in either direction. The correct position for most people is a slight backward tilt of 10 to 15 degrees. This means the top of the screen is slightly farther from your face than the bottom, which keeps your gaze angled very slightly downward without forcing you to drop your chin. Think of it like looking at a piece of paper resting at a slight recline on a music stand.
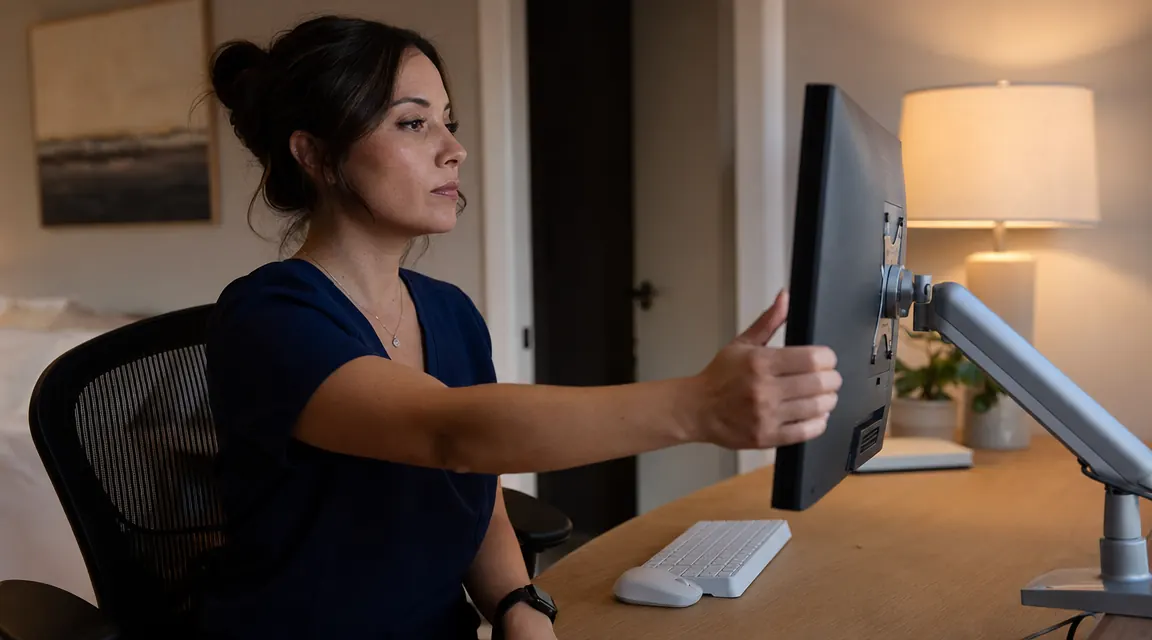
For distance: sit with your back against your chair and extend your arm toward the screen. Your fingertips should just graze the screen surface. If your arm is fully extended and not quite reaching, the monitor is too far. If your elbow is still bent, it is too close. This arm-length rule is a fast approximation of the 20-to-28-inch ergonomic viewing range and it works for most people without a tape measure.
One more tilt check: lean forward slightly and look at the screen. If you notice heavy glare from an overhead light or window, tip the monitor top slightly farther backward. A two-degree tilt adjustment is usually enough to kill the glare without shifting the screen out of the ergonomic zone.
After I corrected the height and tilt, the neck tightness that hit me every evening around the ninth hour of charting dropped by more than half within two weeks. Position is everything. The arm is just the tool.
Step 5: Route the Cables and Lock Everything Down
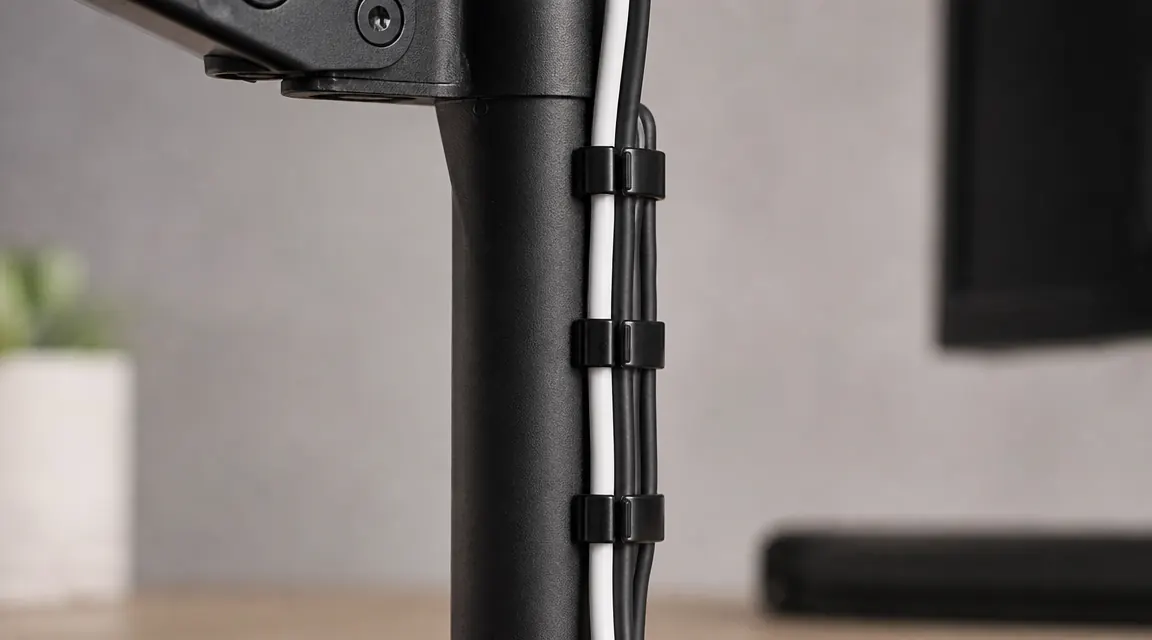
The VIVO arm has a built-in cable management channel running up the back of the vertical pole. Feed your monitor's power and display cables (HDMI, DisplayPort, or USB-C) through this channel before you finalize the arm position. The arm ships with two or three small plastic clips that snap onto the arm itself. Use them to keep cables from pulling on the back of your monitor or swinging loose when you adjust the arm angle.
Once cables are routed, do a final tighten of all four adjustment points: the clamp bolt, the pole collar bolt, the horizontal arm tension knob (the knob on the underside of the arm near the VESA plate, which controls how easily the arm swings and tilts), and the VESA plate locking pin. The tension knob is personal preference. I keep mine firm enough that the arm stays exactly where I put it but loose enough that I can reposition with light pressure. If the arm drifts down slowly over days, that knob needs to go tighter.
Once everything is locked down, sit at full shift posture for five to ten minutes and notice where your eyes naturally land on the screen. If you find yourself tilting your chin up to see the top content on the page, lower the arm by half an inch. If you are dropping your chin down, raise it. This fine-tuning pass is where most of the real relief comes from. The geometry only needs to be off by a small amount to cause fatigue over a long session.
Three Common Mistakes That Undo All of This
The first common mistake is setting the arm position once and then never touching it again after changing chairs or desk heights. If you switch to a new chair or adjust your desk, even by an inch or two, re-check all five steps from the start. The relationship between your seated eye level and the screen position changes with every seat height adjustment. Five minutes of re-checking is far less painful than two weeks of neck fatigue.
The second mistake is relying on the arm to compensate for a monitor that is physically too small or too large for the viewing distance. A 24-inch monitor set at arm-length feels very different from a 34-inch ultrawide at the same distance. If you run a very large screen, you may need to push it slightly farther back to avoid having to scan left and right constantly, which causes its own neck strain from lateral movement. VIVO's arm gives you the range to accommodate this adjustment.
The third mistake is treating the arm as a set-it-and-forget-it tool. Your posture shifts during a long session, especially after hour six or seven. Occasionally catching yourself and consciously resetting your back against the chair keeps the ergonomic geometry intact. The arm makes it easy to adjust on the fly when you notice drift. Tap the arm up or down slightly if the screen starts feeling wrong partway through a session rather than grinding through the discomfort.
What Else Helps Once the Arm Is Set
A correctly positioned monitor arm takes the biggest single variable (screen height and angle) off the table. But neck and eye strain during long home-office or charting sessions usually involves two or three compounding factors at once. The other things I found worth addressing once the arm was dialed in: desk lighting and screen brightness. If the room behind your monitor is darker than the screen, your pupils are constantly trying to reconcile two very different light levels, and that causes fatigue that feels like neck tension but is actually eye strain. A monitor light bar that illuminates the desk surface without creating screen glare is the next upgrade I made after the arm. For my setup, that made evening charting sessions noticeably easier on my eyes. You can read more about that in my review of the Quntis monitor light bar if lighting is also part of your problem.
Chair height also compounds with monitor height. If you lower your chair to relieve knee pressure and do not re-check the monitor position afterward, the ergonomic relationship between your eye level and the screen shifts. Treat chair height and monitor height as a pair. When one changes, re-check the other. It takes two minutes and makes a meaningful difference. For more context on why a monitor arm is one of the highest-leverage single upgrades for a home desk, the breakdown in my piece on the ten reasons a monitor arm transforms your desk setup covers the mechanics in detail.
The VIVO Arm I Used for Every Step in This Guide
VIVO's single monitor arm (ASIN B00B21TLQU) fits monitors up to 32 inches and 22 lbs, clamps to any desk up to 3.5 inches thick, and includes the VESA hardware and cable clips you need. It is the arm I have used for two years of evening charting. You can see the full long-term breakdown in my VIVO monitor arm review.
Amazon Check Today's Price on Amazon →